Großartige Denkanstöße!

Großartige Denkanstöße!


Referenzenlisten können ziemlich dröge sein. Oft bleibt es bei einer Liste von Namen, weil man keinen Patchworkteppich von Bildern abliefern will. Was aber, wenn man einfach einen Haufen extem toller Bilder auf Lager hat?
Warum nicht dezente Kameraicons hinter die Referenzen setzen, die bei Mouseover durch ein Vorschaubild-Tooltip zum Aufklicken eines kleinen Galerierundgangs einladen! Das Tooltip-Skript wie der Niederländer Yann Lorber es für ein Projekt einsetzte in Kombination mit Fancybox 1.3.4 do the trick.

Vorsicht, beide Skripte sind schon etwas „betagt“ und zumindest das Tooltip-Skript hat eine Eigenheit: es mag nur mit jQuery 1.3.4 zusammenarbeiten, bei höheren Versionen versagt es den Gehorsam. Außerdem möchte es erst als letztes vor dem Schließen des Bodytags aufgerufen werden, seine CSS aber noch im Head, in jedem Fall VOR dem Skript bekommen. Außerdem können die einfachen Anführungsstriche des Originalskripts problematisch sein. Wenn das Skript so gar nicht funktioniert hat es geholfen, sie durch
\"
zu ersetzen.
Der Reihe nach
Das hier kommt in den HEAD:
	<script src="jquery.easing.js" type="text/javascript"></script>
	<script src="jquery-1.3.2.js" type="text/javascript"></script>
	<link href="tooltips.css" rel="stylesheet" type="text/css" />
	<script type="text/javascript" src="jquery.fancybox-1.3.4.pack.js"></script>
    <script type="text/javascript" src="jquery.mousewheel-3.0.4.pack.js"></script>
    <link rel="stylesheet" href="jquery.fancybox-1.3.4.css" type="text/css" media="screen" />
	<script type="text/javascript"> $(document).ready(function() {
		$(".fancybox").fancybox();
		});
	</script>
Das als letztes vor dem Schließen des BODY
<script src="tooltip.js" type="text/javascript"></script>
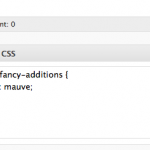
Das hier ist die Tooltipp-CSS, ich nenne sie tooltips.css:
#screenshot,
#screenshotBox {
height : 202px!important;
width : 202px!important;
top:1px;
left:1px;
}
#screenshot {
color : #ffffff!important;
/*display : none!important;*/
position : absolute!important;
z-index:9900!important;
}
#screenshotBox {
background : #fff none repeat scroll 0 0;
position: relative;
z-index:9900!important;
}
#screenshotBox img {
z-index : 9999!important;
position: absolute;
top:1px;
left:1px;
}
.triangle {
border-color : #fff transparent transparent;
border-style : solid;
border-width : 5px 5px 0;
height : 0;
margin-left : 125px;
width : 0;
z-index:9900!important;
}
Das ist das Tooltipp-Skript tooltip.js:
		/* *******************************************
		*
		*	Tooltipp
		*	Source: Fat-Man Collective - www.fat-man-collective.com
		*	Coded by Yann Lorber - www.yannlorber.fr
		*	August 2009
		*
		******************************************* */

		if( $("a.screenshot").length )
		{
			xOffset = 175;
			yOffset = -127;

			$("a.screenshot").hover(function(e){

				var imgurl = $(this).attr("id");

				$("body").append("<div id=\"screenshot\"><div id=\"screenshotBox\"><img src=\"http://path-to-your-images-folder/"+ imgurl +"\"  /></div><div class=\"triangle\"></div>"+"</div>");
				$("#screenshot").css("top",(e.pageY - xOffset) + "px")
								.css("left",(e.pageX + yOffset) + "px")
								.fadeIn("fast");
				},function(){

				$("#screenshot").remove();
    		});

			$("a.screenshot").mousemove(function(e){

				$("#screenshot").css("top",(e.pageY - xOffset) + "px")
								.css("left",(e.pageX + yOffset) + "px");
			});
		}
Im HTML-Kontext sieht die Anwendung dann so aus (Beispiel):
<ul>  <li>?	Penthouse am Park BBB (3)
  	<a class="screenshot fancybox" rel="rundgang" title="Penthouse am Park" id="ref_penthouse-park_01_th.jpg" href="web-img/ref_penthouse-park_01.jpg"><div class="photo"></div></a>
	<a class="screenshot fancybox" rel="rundgang" title="Penthouse am Park" id="ref_penthouse-park_02_th.jpg" href="web-img/ref_penthouse-park_02.jpg"><div class="photo"></div></a>
	<a class="screenshot fancybox" rel="rundgang" title="Penthouse am Park" id="ref_penthouse-park_03_th.jpg" href="web-img/ref_penthouse-park_03.jpg"><div class="photo"></div></a></li>
</ul>
Die Class „screenshot“ sagt hallo zum Tooltipp-Script, das sich aus der „id“ das im Tooltipp anzuzeigende Bild holt. Die Klasse „fancybox“ ruft die Fancybox ins Standby, die das Bild beim Klick aufs Kameraicon öffnet. Aus dem „title“ holt sich Fancybox die Bildunterschrift. Das Attribut „rel“ sagt Fancybox, dass es sich um ein Bild einer Reihe handelt, die später in der Fancybox auch der Reihe nach, also ohne das Bild wieder schließen und das nächste öffnen zu müssen, angeschaut werden können. Mit mehreren „rel“-Namen können auch innerhalb ein– und derselben HTML-Seite mehrere Reihen erstellt werden, ohne „rel“-Attribut bleibt das entsprechende Bild ein Solitär. Ah ja, für das lustige Kamera-Icon, dessen mouseovern den Tootipp-Effekt abfeuert habe ich in CSS so geschrieben:
ul li .photo {
	display:inline-block;
	border:none;
	width:15px;
	height:12px;
	margin-left:7px;
	background: url(web-img/referenzen_kameraicon.png) no-repeat
}
Den Artikel zum Reinkommen schreibt (einmal mehr) Ellen vom Elmastudio:
www.elmastudio.de/wordpress/wordpress-3-1-artikel-…
Hier listet der WordPress-Codex die Grundlagen von offizieller Seite:

# You could give those elements custom classes and then hide them based on device max-width. You can setup any number of rules like this and this is what is commonly known as a media query. It’s the basis for changing styles based on size.
@media only screen and (max-width: 959px) {
    div.desktop-only {
    display:none;
    }
    }
You can also set a range.
@media only screen and (min-width: 768px) and (max-width: 959px) { /*code here*/ }
by Scott Reilly (coffee2code)
Automatically hyperlink text URLs and email addresses originally written only as plaintext.
coffee2code.com/wp-plugins/auto-hyperlink-urls/
This plugin seeks to replace and extend WordPress’s default auto-hyperlinking function. This plugin uses different pattern matching expressions than the WordPress default in order to prevent inappropriate adjacent characters from becoming part of the link (as WordPress has improved over the years, nowadays this is just a few edge cases like text links that are braced or bracketed) and it prevents invalid URIs (i.e. blah) from becoming links.
More significantly, this plugin adds configurability to the auto-hyperlinker such that you can configure:
This plugin will recognize any protocol-specified URI (http|https|ftp|news)://, etc, as well as email addresses. It also adds the new ability to recognize Class B domain references (i.e. “somesite.net”, not just domains prepended with “www.”) as valid links (i.e. “wordpress.org” would get auto-hyperlinked)
The following domain extensions (aka TLDs, Top-Level Domains) are recognized by the plugin: com, org, net, gov, edu, mil, us, info, biz, ws, name, mobi, cc, tv. These only comes into play when you have a plaintext URL that does not have an explicit protocol specified. If you need support for additional TLDs, you can add more via the plugin’s admin options page.
This plugin also activates auto-hyperlinking of text links within post/page content.
Natürlich versuche ich, was viele versuchen: Menüs und Widgets einer WordPress-Installation samt Einstellungen unabhängig vom Theme – und, wichtig, von Themewechseln – zu speichern. Und natürlich gelingt es noch nicht. Hier die ersten Rechercheergebnisse rund um Menüs. Sehr allgemeines Zeug, nichts zielführendes:

 Der CSS-Editor Topstyle 4 bietet nativen Import von Server-Settings nur für aus Topstyle 3 exportierte Settings an. Wenn man die Settings aus einer Topstyle-4-Installation transferieren will führt kein Weg an der Registry vorbei, aber keine Angst, es tut nicht weh:
Das war’s dann auch schon. Der Tipp kommt vom offiziellen Topstyle-Support via hier.

Für alles, was außerhalb von und nach Facebook geht, braucht man jeweils eine Anwendung („App“). Das fängt mit „Like“-Buttons an. Wann immer man eine App anlegen will, geht es (nachdem man sich eingeloggt hat) über dieses Portal los:


# PHP (rekursives Akronym für „PHP: Hypertext Preprocessor“, Backronym aus „Personal Home Page Tools“) ist eine Skriptsprache mit einer an C und Perl angelehnten Syntax, die hauptsächlich zur Erstellung dynamischer Webseiten oder Webanwendungen verwendet wird.[2] PHP wird als freie Software unter der PHP-Lizenz verbreitet.
PHP zeichnet sich durch die breite Datenbankunterstützung[3] und Internet-Protokolleinbindung sowie die Verfügbarkeit zahlreicher Funktionsbibliotheken[4] aus. PHP wird auf ca. 75 % aller Websites als serverseitige Programmiersprache eingesetzt[5] und ist damit die am häufigsten verwendete Sprache zum Erstellen von Websites.
Theme Demo demo.themeshift.com/designum/
Shortcodes demo.themeshift.com/designum/features/shortcodes/
# „On one instance of my site I want to set a max width for images not to overflow. Of course I want to retain image proportions. Images are of various sizes so I am unable to use fixed settings. The TimThumb script turned up in my searches but does not fit my needs as it does not have a maximum setting. Is there any plugin or hack out there that solves my problem?“ Add to the theme’s functions.php file:
/*-----------------------------------------------------------------------------------*/
/* Set the content width based on the theme's design and stylesheet.
/*-----------------------------------------------------------------------------------*/

if ( ! isset( $content_width ) )
	$content_width = 612; /* pixels */
# The
$content_widthis used for a lot of things, but essentially it’s meant to define the width of the „content“ area of your site. The content area being the space where the posts display. Images inserted into posts are auto-sized down (not up) to that width, so they won’t overflow. Note that this sizing happens at the time the post is created and the image is inserted into the post.
/*-----------------------------------------------------------------------------------*/
/* Sets up theme defaults and registers support for WordPress features.
/*-----------------------------------------------------------------------------------*/

	// This theme uses post thumbnails
	add_theme_support( 'post-thumbnails' );
[# by Ian Stewart] This August I had the pleasure of speaking at WordCamp San Francisco on awesome-ing up WordPress themes with Post Formats. If you wanted to check out my presentation but weren’t there, or missed the livestream, have no fear! You too can check it out, right now, right here, thanks to the magic of WordPress.tv.
[wpvideo mQYoMjUY]
If you want to follow the along with the slides, you can do that too by downloading them right here.
Awesome WordPress Themes Mentioned In My Talk:
Of course, there are even more cool themes out there using Post Formats in awesome ways. And you’re going to be making some of them, right? I hope so. ![]()


Très dynamique…chaos.co.ke
Source: speckyboy.com


# It always works the same when you are adding and moving stuff. you add FUNCTIONS to HOOKS. think of hooks like parking spots. some are empty, some have cars on them. you can move the cars around, etc.
function function_you_want_to_add(){
echo "I heart bacon!";
}
add_action('destination_hook','function_you_want_to_add',$priority# );
Removing stuff works a bit differently:
function remove_stuff(){
remove_action('hook_location','function_you_want_to_remove',$priority# );
}
add_action('init','remove_stuff');
init is just a default wordpress hook. in fact, it is the FIRST one that runs when WP starts whirring.
it took me a long time to understand filters. think of filters like this… they are still parked in the same parking spot, but something about the car is different. filters change something w/o moving it.
you can filter anything that says
apply_filters('this_is_the_filter_name', $somevariable);
filters take something IN and spit something OUT. send a blue car into the function and it might come out red.
function sample_filter_function($input_from_original){
$send_output_to_filter = $input_from_original . " Add some bacon!";
return $send_output_to_filter;
} add_filter('this_is_the_filter_name','sample_filter_function',$priority#);
Whatever content WAS going to be printed will now have “ Add some bacon!“ tacked on to the end, b/c well.. who couldn’t use more bacon?
Lastly, the $priority# stands for priority number. it is like a traffic cop in the parking lot. or maybe just an orange cone. if more than 1 function wants to be on a particular hook the priority decides which goes first same as if 2 cars want to park in the same spot (sorry, had to beat this metaphor to death). the higher the number the later it gets run. this can be important, but is not always necessary.
Props to @kwight for starting the parking metaphor. Apparently my ball-pit metaphor didn’t make any sense b/c no one knew what a ball-pit was.
# Looking at the source code it appears that every widget would be proceeded by <ul class=“xoxo“>. Is there any easy way to filter this out?
# XOXO (eXtensible Open XHTML Outlines) is an XML microformat for outlines built on top of XHTML. Developed by several authors as an attempt to reuse XHTML building blocks instead of inventing unnecessary new XML elements/attributes, XOXO is based on existing conventions for publishing outlines, lists, and blogrolls on the Web.

		/* *******************************************
		*
		*	Tooltip
		*	Source: Fat-Man Collective - www.fat-man-collective.com
		*	Coded by Yann Lorber - www.yannlorber.fr
		*	August 2009
		*
		******************************************* */

		if( $("a.screenshot").length )
		{
			xOffset = 210;
			yOffset = -132;

			$("a.screenshot").hover(function(e){

				var imgurl = $(this).attr("id");

				$("body").append("<div id='screenshot'><div id='screenshotBox'><img src='images/"+ imgurl +"'  /></div><div class='triangle'></div>"+"</div>");
				$("#screenshot").css("top",(e.pageY - xOffset) + "px")
								.css("left",(e.pageX + yOffset) + "px")
								.fadeIn("fast");
				},function(){

				$("#screenshot").remove();
    		});

			$("a.screenshot").mousemove(function(e){

				$("#screenshot").css("top",(e.pageY - xOffset) + "px")
								.css("left",(e.pageX + yOffset) + "px");
			});
		}


Dans la logique des thèmes WordPress, vous serez vous amené à visiter le code source de votre fichier single.php. Mais qui est-il ? Que fait-il ? A quoi sert-il ? Découverte de ce fichier single.php
Répondons immédiatement à la question « A quoi sert ce single.php ? » Il affiche vos articles sur votre site. Rien de moins que cela. Ce qui le rend quelque peu important. Si vous faites n’importe quoi, n’importe comment dans le code de ce fichier, ce sont l’intégralité de vos articles qui vont partir en sucette. Sensible n’est-ce pas ?
Un base de données et un fichier php on cela de merveilleux. Avec un seul fichier, vous allez pouvoir afficher des milliers d’articles. Le revers de la médaille, comme indiqué précédemment,c’est qu’une seule coquille dans ce fichier, et c’est tout votre contenu qui est vrillé.
En soit, le fichier single n’est pas un monstre de complication. Il serait même assez « rudimentaire » dans sa version de base. En effet, pour afficher votre article, il suffit « simplement » de faire un appel à la boucle WordPress, et le tour est joué.
La boucle va récupérer ce qu’elle doit, là où elle le doit et renvoyer l’article qui va bien à votre visiteur.
Là où cela devient un tantinet plus compliqué pour le novice, c’est la mise en forme de la page. Comme toujours, si le CSS et l’HTML sont pour vous aussi clair que du chinois, autant vous dire que vous allez passer un mauvais moment. D’un autre côté, ce n’est pas en prenant la fuite que vous allez apprendre…
Les marqueurs utiles
Pour votre single.php, vous allez devoir faire appel à certains marqueurs WordPress, regardons les quels
the_title : affiche le titre de l’article
the_excerpt : affiche l’extrait de l’article
the_content : l’article lui même
Vous devrez également utiliser deux fonctions obligatoires, qui vont ouvrir et fermer votre fichier.
get_header : appel le header de wordpress et ses fonctions liées
get_footer : idem que précédemment, mais pour le pied de page
En résumé, j’ouvre mon fichier avec la fonction get_header, puis, je place mes marqueurs, enfin, je ferme mon fichier avec get_footer.
En suivant cela, votre page affichera l’en-tête du site, le titre de l’article, son extrait, l’article, et enfin le pied de page.
Il vous « restera » à vous occuper de la mise en page.
Un exemple de fichier single commenté: