Alles was Sie über Schleichwerbung wissen wollten und sollten erfahren Sie in der heutigen Podcastfolge und den umfassenden FAQ zum Thema.
Quelle: Schleichwerbung – Rechtsbelehrung Folge 24 (Jura-Podcast & Große FAQ) | I LAW it
Alles was Sie über Schleichwerbung wissen wollten und sollten erfahren Sie in der heutigen Podcastfolge und den umfassenden FAQ zum Thema.
Quelle: Schleichwerbung – Rechtsbelehrung Folge 24 (Jura-Podcast & Große FAQ) | I LAW it
Wer kreativ arbeitet, probiert aus, nimmt häufig Korrekturen und Anpassungen vor und verwirft die Entscheidungen evtl. einen Tag später wieder. Um trotz des sprunghaften Ablaufs effektiv zu sein, sollte man möglichst wenig Pixel unwiederbringlich zerstören. Korrekturen lassen sich nur so schnell und unkompliziert vornehmen. Dieses Prinzip nennt sich non-destruktives oder verlustfreies Arbeiten und ist die Basis eines professionellen Workflows. Mit jeder Photoshop-Version kommen neue verlustfreie Methoden hi
Quelle: Die wichtigsten non-destruktiven Photoshop-Techniken + Tipps, Tricks & Videos | kulturbanause® blog
Content Seeding gehört zu den Grundpfeilern jeder zeitgemäßen Linkbuilding und Content Marketing Kampagne im SEO. Denn der Erfolg einer Kampagne bemisst sich immer darin, wie konsequent und effektiv das Seeding, sprich: das Streuen der angebotenen Inhalte unter der anvisierten Zielgruppe war. Auf Nachhaltigkeit bedachte Webseitenbetreiber haben für ihre Seiten natürlich immer schon hochwertigen Content erstellt. Der jüngere Trend der SEO-Szene hin zum aktuellen Buzz-Word Content Marketing sollte deshalb all jenen endlich Recht geben, denen immer schon wichtig war, den Besuchern ihrer Seiten mal unterhaltende, mal informative Mehrwerte zu bieten und sie nicht nur direkt als Kunden anzuwerben.
Quelle: Content Seeding Grundlagen – Definition, Planung und Strategie – Content Seeding 101
So now you have an amazing piece of content and you want to share it with the world. By instinct you might rush to Facebook or Twitter to blast it to all your friends. But if you are a smart marketer you will want to develop a social sharing strategy that is designed to grow the content’s reach over time. This is called “social seeding”. In this post we are going to explore the best tactics for social seeding on 4 popular networks. With in each network we will discus three areas: Packaging, Delivery, and Growth.
Quelle: Seeding Content In Social Media For The Biggest Impact
Content seeding is a strategic approach to scatter content across the Internet. Content creators spread content to various locations where that content will be read, noticed and spread. Often, content creators target relevant influencers in hopes that those well-connected influencers use their own networks to distribute the content. This marketing approach aims to increase brand awareness by pushing content across the web to relevant target groups.
Quelle: Content Seeding | Textbroker
Definition:
Throwback Thursday is the name of a weekly social media posting theme that users participate in as part of a very general „throwback“ activity for posting content. In this case, the „throwback“ theme can pertain to basically anything that happened in the past.
On Thursdays, anyone can participate in the Throwback Thursday trend by posting content (usually a photo) on social networking sites like Instagram, Twitter, Tumblr or Facebook to remember a past event. Photos can be from years ago or from just a few days ago. There aren’t really any limitations, and even though it can be fun to participate, it really just gives people an excuse to post more.
Throwback Thursday is very popular on Instagram, and users often tag their photos with a variety of hashtags like #TBT, #ThrowbackThursday or just simply #Throwback. Adding these hashtags can help get photos more exposure from a wider audience of people who are searching through those tags.
Unfortunately, a lot of users on Instagram take advantage of the popular #TBT hashtags and fill them with spam or unrelated content in hopes of gaining more likes and followers. Just go ahead and search through the content posted in the #TBT or #ThrowbackThursday hashtags on Instagram and you’ll be bound to stumble across tons posts that have nothing to do with the theme.
The trend is quickly catching on to other social networks too — especially ones that use hashtag functionality — like Twitter and Facebook. Businesses and brands have also begun using it as part of their social media marketing and community building strategies.
Why Is Throwback Thursday So Popular?
People love the feeling of nostalgia. That’s really all there is to it.
Social media is used for sharing our lives often as it’s happening, but we’ll take any excuse to reminisce about the old days and the good feelings that come with it. A strong emotional response acts as a catalyst for social sharing, so it makes sense that your most beloved memories of the past are among the things you love to share the most — even if it only matters to you, and nobody else.
What to Post on Throwback Thursday
You don’t have to be a social media superstar or have thousands of followers to get in on this trend. All you need to do find something about the past to post about, and tag with #ThrowbackThursday, #Throwback or #TBT.
Old photos of you from your childhood. This is a big trend and it’s something that everyone can do. If you’re an adult, you probably have at least a few fond memories of being a kid, so post an old photo that brings back some good memories and tag it.
An old song that takes you back in time. Photos are the most popular content to share for this trend, but songs are not far behind. People love to share songs from decades ago that evoke a strong sense of nostalgia. Post a screenshot of what you’re listening to or just simply share the link to the song itself.
Screenshots of old Facebook status updates or tweets. Here’s a new one. Social media has been around long enough that we can now look back on some of crazy things we used to post online all those years ago. Timehop is a great tool for checking out what you posted a year ago.
Throwback Thursday Continued: Flashback Friday
Social media users apparently love this trend so much and can’t get enough of it once a week that they decided to extend it into Friday. Flashback Friday is the equivalent of Throwback Thursday — but meant to be posted on with the accompanying #FlasbackFriday (or #FBF) hashtag on Fridays.
Weekday Hashtag Games for Every Day of the Week
Believe it or not, there’s a hashtag theme trend just like #TBT for every day of the week. Although they’re not quite as popular, they still give you a great excuse to find more content ideas and post way more often.
Check out this weekday Instagram hashtag article to find out what hashtag themes you can play around with from Monday to Friday, and even on weekends.
Wir suchen uns nun die folgenden Zeilen
// ** MySQL settings ** //
define('DB_NAME', 'wordpress');     // The name of the database
define('DB_USER', 'username');     // Your MySQL username
define('DB_PASSWORD', 'password'); // ...and password
define('DB_HOST', 'localhost');     // 99% chance you won't need to change this value
und schreiben die Die Daten von Strato hinein.
Hinweis:
Statt ‘localhost’ trägt man bei allen Strato-Standard-Accounts ‘rdbms.strato.de’ ein.
Das ganze sieht dann etwa so aus:
Die kleinen xxxxxx stehen für die Zahlenwerte.
// ** MySQL settings ** //
define('DB_NAME', 'DBxxxxxx');     // The name of the database
define('DB_USER', 'Uxxxxxx');     // Your MySQL username
define('DB_PASSWORD', 'daspasswort'); // ...and password
define('DB_HOST', 'rdbms.strato.de');     // 99% chance you won't need to change this value
Jetzt das ganze auf den Server hochladen und online den Weg zu wp-admin/install.php suchen.
(Wenn es an dieser Stelle zu knifflig wird, hat hier eine ausführlichere Anleitung).
Typisches Problem: Blödsinnigerweise suchen die Server von Strato nicht automatisch eine index.php, wenn sie keine index.html finden und darum muß man eine .htaccess Datei mit dem inhalt DirectoryIndex index.php einrichten.
Wir nehmen uns wieder dieses einfache Textprogramm (nicht Word!) und schreiben in eine leere Seite
<strong>DirectoryIndex index.php</strong>
hinein und speichern sie unter dem Namen .htaccess ab. (Punkt vornedran nicht vergessen.) Windows-Nutzer geben als Dateinamen “.htaccess” (mit Anfuehrungszeichen) im “Speichern Unter”-Dialog an. Die .htaccess Datei muß dann im gleichen Ordner liegen, wie die index.php.
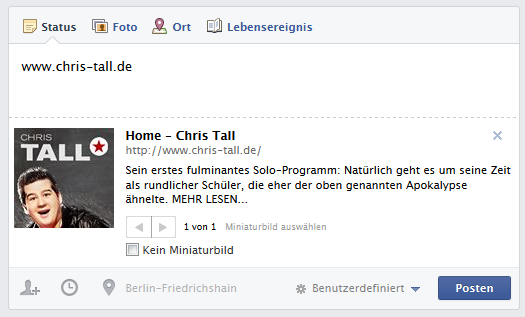

Bildgröße in Facebook ist 100×100 Pixel, hochzuladen sind 200×200. Aufgerufen durch drei Zeilen im WP-Header:
Da der FB-Cache hartnäckig ist, sollte ein neues Vorschaubild immer einen anderen Namen bekommen – etwa immer das minutenengenaue Datum an den Dateinamen hängen (Beispiel: „dateiname2013081200643.jpg“). Dieser Thread aus Stackoverflow brachte die Idee: „This worked, but I first had to change the og:image URL (both on the server and in the tag) to get it to pick up the change. You can then change it back to the original URL afterward, and it will pick up the change again (if you had the OP’s problem of not being able to change it permanently).“
How To Create a WordPress Theme: The Ultimate WordPress Theme Tutorial
Posted on June 22, 2009 by Ian Stewart
Update: We’ve created a second edition of this popular tutorial! It contains updated code samples, coverage of the latest theme development techniques, and more. Check it out at The ThemeShaper WordPress Theme Tutorial: 2nd Edition.
In only 11 individual lessons this WordPress Theme Tutorial is going to show you how to build a powerful, up-to-date, WordPress Theme from scratch. As we go along I’ll explain what’s happening including (for better or worse) my thinking on certain techniques and why I’m choosing one path over another. Essentially, I’ll be teaching you everything you need to know about WordPress Theme development.
via How To Create a WordPress Theme: The Ultimate WordPress Theme Tutorial | ThemeShaper.
How to Code a WordPress 3.0 Theme from Scratch
March 8th, 2011 by Keenan Payne | WordPress | 235 Comments
With the release of WordPress 3.0 came the implementation of many new features to the popular content management system. In this tutorial we are going to show you exactly how to code a WordPress 3.0 theme from the ground up to take advantage of all of these new features, as well as create a blogging-ready, minimal theme.
Haare, die mit Graustufenmaske freigestellt wurden mit gruppierter Farbebene in Hintergrund integrieren.
# Ihre Bilder, die Sie an uns senden, müssen eine Größe von mindestens 1280 Pixel aufweisen — wir empfehlen eine Bildergröße von mindestens 2560 Pixel. Ist diese Mindestanforderung erfüllt, spielen andere Werte wie Abmessungen (inches, mm, Punkte usw.), Dateigröße (kb oder MB) oder Bit-Anzahl (8-bit, 16-bit usw.) sowie die Auflösung (Pixel/Punkte pro inch) keine Rolle.
# Wenn Sie Ihre Bilddateien an Amazon übermitteln, richten Sie sich bitte bei der Benennung nach den folgenden Konventionen: Der Name des Bildes muss wahlweise dessen ASIN, ISBN, EAN, JAN oder UPC enthalten, gefolgt von einem 4-stelligen Variantencode (MAIN, PT01 usw.) und dem Dateiformat. Achten Sie darauf, dass der Dateiname keine Bindestriche, Unterstriche, Leer- oder Sonderzeichen enthält, da wir Ihre Datei sonst nicht verarbeiten können. Die einzelnen Teile einer Produktbezeichnung müssen durch einen Punkt voneinander getrennt sein.
Bitte entfernen Sie sämtliche Leerzeichen, Bindestriche oder Unterstriche aus der Produktbezeichnung.
Gerne können Sie weitere Ansichten Ihres Artikels übermitteln. Dazu fügen Sie dem Namen des jeweiligen Bildes einen 4-stelligen Variantencode hinzu, z. B. B000123456.PT01.jpg.
Bilder und verschiedene Ansichten können aus den folgenden 4-stelligen Varianten-Codes bestehen:
Das ist das Hauptbild, die Frontabbildung Ihres Artikels. Diese Ansicht erscheint auf den Suchergebnisseiten und auf der Produktdetailseite. Ohne den Zusatz MAIN bei eines Ihrer Bilder erscheinen keine der anderen Bildvarianten/-Ansichten. Speichern Sie Ihre Bilddatei ohne Variantencode, wird dieses Bild als Hauptbild (=MAIN) verarbeitet.
PT01, PT02, PT03, PT04, PT05, PT06, PT07, PT08, PT09 (die Nummerierung bestimmt die Reihenfolge der Anzeige auf der Detailseite)
IN01, IN02, IN03
TOPP (=oben), BOTT (=unten), LEFT (=links), RGHT (=rechts), FRNT (=vorne), BACK (=Rückseite)
Dateiformate sind die drei oder vier Zeichen am Ende der Datei, die den Dateityp kennzeichnen (jpg/jpeg, tif/tiff). Beachten Sie bitte, dass sich mit dem Ändern des Dateiformates nicht auch der Dateityp ändert. Bitte konvertieren Sie als Erstes Ihre Bilder zum JPEG- oder TIFF-Format mit Hilfe einer geeigneten Bildbearbeitungssoftware.
Wenn Sie Ihre Bilddateien nicht wie oben beschrieben benennen, können wir Ihre Bilder nicht verarbeiten.
TIFF/TIF- und JPEG/JPG-Format
Bei Amazon akzeptieren wir zwei Dateiformate für Bilder: TIFF (Tagged Image File Format) und JPEG (Joint Photographic Experts Group).
Amazon komprimiert die Bilder ein weiteres Mal, bevor sie auf die Seite gestellt werden. Am besten komprimieren Sie Ihre Bilder nur wenig oder gar nicht, bevor Sie sie an uns übermitteln. JPEGs sollten Sie auf dem höchstmöglichen Qualitätslevel speichern und während des Bearbeitens nicht wiederholt als JPEG speichern. TIFF-Dateien komprimieren Sie bitte überhaupt nicht.
Bevor Sie Ihre Bilder an uns senden, entfernen Sie bitte sämtliche Layer, falls vorhanden.
Beachten Sie bitte, dass Bilder der folgenden Formate von Amazon nicht verarbeitet werden: EPS (Encapsulated Postscript File), GIF (Graphic Interchange Format), BMP (Windows Bitmap), PNG (Portable Network Graphics) oder PDF (Portable Document Format). Außerdem werden keine Bilder verarbeitet, die mit bestimmten Software-Anwendungen erstellt oder bearbeitet wurden, wie etwa .PSD (Native Photoshop Files), .IA (Adobe Illustrator), .ART (America Online), .CDR (CorelDRAW), .CPT (Corel Paint), .FH (Macromedia Freehand), .FLA (Flash), .PICT (MAC OSX default), .PSP (Paint Shop Pro) und .DOC (Microsoft Word).
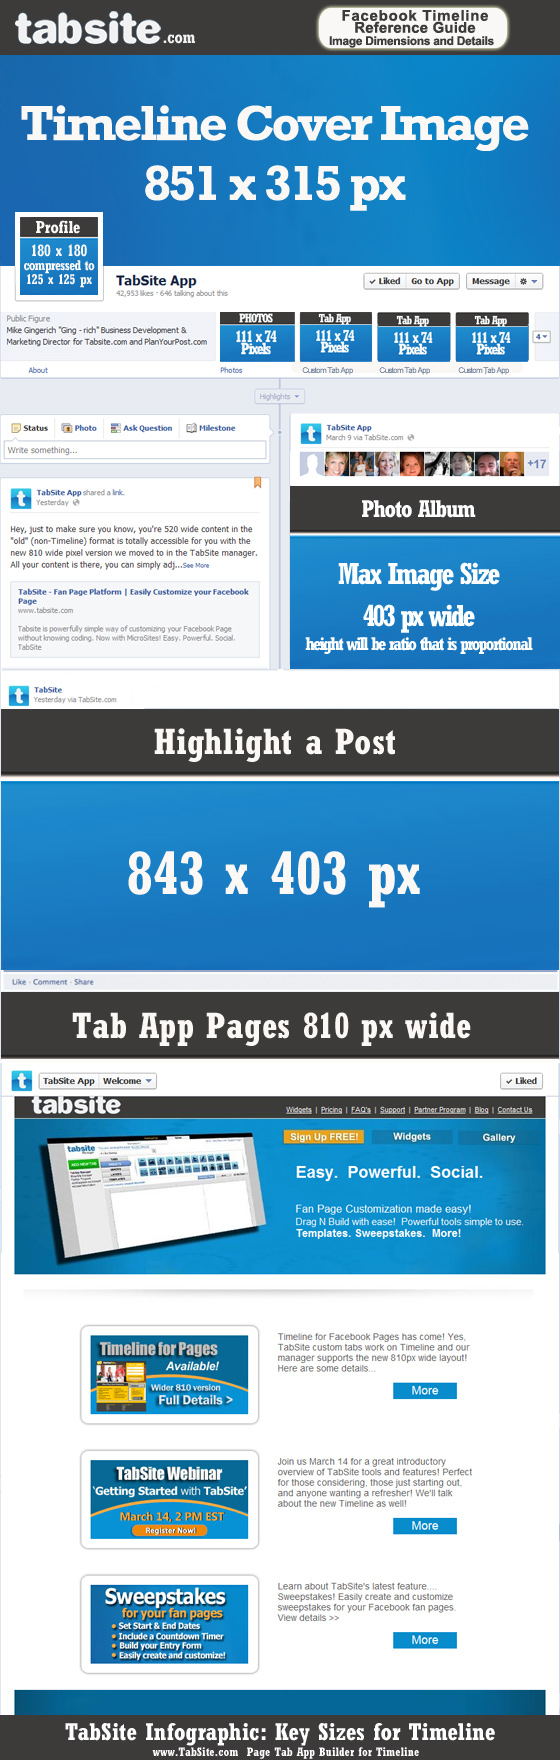
Das Facebook Titelbild besitzt eine Größe von 851 x 315 Pixel. Das zugrundeliegende Bild kann bis zu 851×851 Pixel groß sein, danach skaliert Facebook mit einer ziemlich gnadenlosen Komprimierung alles runter.
Das Facebook Profilbild eine Größe von 180 x 180 Pixel, diese werden durch den Upload auf 160 x 160 Pixel reduziert.
Teilt man sich Bilder über die Chronik, ist die Größe von 403 x 403 Pixel ideal.
Das Bild in Gruppen hat eine Größe von 787 x 246 Pixel.
Das Tab Bild ist 111 x 74 Pixel groß, werden auch als Icon bei Applikationen verwendet.
Im Facebook Tab innerhalb einer Applikation beträgt die Bildbreite maximal 810 Pixel.
Als Meilenstein oder Highlight Bild kann die Größe von 843 x 403 Pixel verwendet werden.
Formate: .jpg, .png, gif
In Google+ gibt es das Profilbild und ein Hintergrundbild, ähnlich wie bei Facebook.
Das Profilbild hat eine Größe von 250 x 250 Pixel, und das breite Hintergrundbild 940 x 180 Pixel. Statt eines breiten Hintergrundbildes können einzelne Fotos auch hochgeladen werden, doch nicht wie vorher in der Größe von je 125 x 125 Pixel, sondern nun 110 x 110 Pixel.
Formate: .jpg, .png, .gif
Bei Twitter könnt Ihr ein Profilbild von bis zu 700 kb hochladen, es werden jedoch keine animierten GIF-Formate mehr unterstützt.
Formate: .jpg, .gif, .png
Die Bildgröße des Profilbildes beträgt 160 x 160 Pixel.
Formate: .jpg, .png
Im Netzwerk XING wird für das Profilbild eine Mindestgröße von 640 x 846 Pixel empfohlen.
Formate: .jpg, .png, .bmp, .gif
The JW Player supports video in the formats listed here, with file extensions listed between braces. Please note that if a format is not on the list (e.g. WMV or AVI), the JW Player does not support it.
Files in the MP4 container format, containing video encoded with the H.264 codec and audio encoded with the AAC codec. This is today’s format of choice, supporting the best video quality and hardware accelerated playback on a wide range of browsers and devices:
| Internet Explorer 6/7/8 | Flash mode |
| Firefox | Flash mode (not in HTML5) |
| Chrome | Flash, HTML5 modes |
| Internet Explorer 9 | Flash, HTML5 modes |
| Safari | Flash, HTML5 modes |
| Opera | Flash mode (not in HTML5) |
| iOS (iPad/iPhone) | HTML5, Download modes |
| Android | Flash, HTML5, Download modes |
| BlackBerry | Download mode |
If you having troubling seeking within an MP4 file before it completely downloads, the cause of your problem is that the so-called MOOV atom (which contains the seeking information) is located at the end of your video. Check out this little application to parse your videos and fix it.
Both H.264 and AAC support different profiles, different levels of sophistication for encoding the video or audio. We strongly recommend you use the most basic profiles when encoding your content, since these allow for maximum compatibility with older iPhone, Android and BlackBerry devices:
Man braucht einen sicheren Webspace, das ist einer mit SSL-Zertifikat, so gesicherte Seiten fangen mit „https://“ an. G/R hat so ein Zertifikat. Der so ausgestattete Webspace hört auf den Namen
https://gr-01.de
und liegt auf dem Server im Rootverzeichnis im Ordner
www-gr-01.de
Alle Unterordner deses Ordners profitieren vom Zertifikat.
Wenn wir für einen Kunden ein Impressum erstellen, erstellt man zunächst für diesen Kunden einen Unterordner in www-gr-01.de („[kundenkuerzel]“ durch den Namen des Kunden oder ein entsprechendes Kürzel ersetzen):
www-gr-01.de/www-facebook-[kundenkuerzel]
Darin erstellen wir eine völlig normale HTML-Datei, die das Impressum beinhaltet:
www-gr-01.de/www-facebook-[kundenkuerzel]</em>/impressum-facebook-[kundenkuerzel].html
Ein Beispiel-Impressum findet sich unter
https://www.facebook.com/ingo.appelt/app_339600522794531
(ab hier Quelle: blogado) Jetzt loggt man sich bei Facebook ein. Danach geht man zur Seite
https://developers.facebook.com/apps/
…und klickt dort auf „Neue Anwendung erstellen“ (rechts oben). In das sich nun öffnende kleine Fenster gibt man einen Namen für diese neue Anwendung ein. Dann den Richtlinien zustimmen und auf „Weiter“ klicken.

Nun gelangt man auf die Konfigurationsseite für die neue Anwendung.
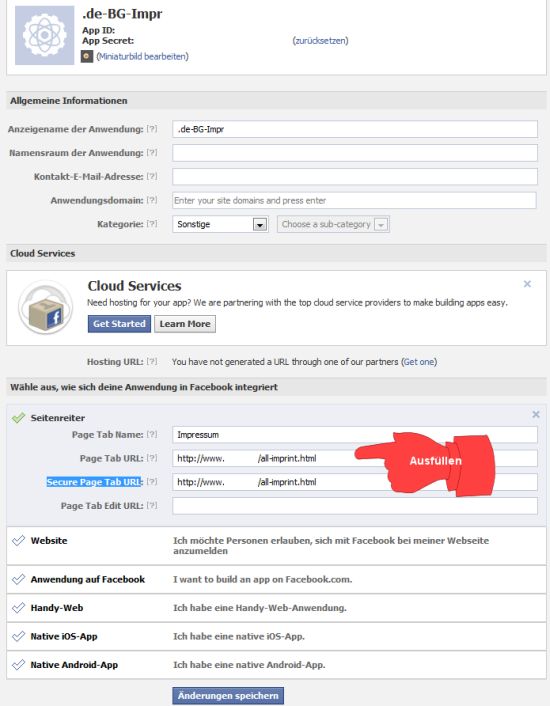
Jetzt klickt man unten auf „Seitenreiter“ und trägt dort dann unter Page Tab Name den Namen ein (z.B. „Impressum [Kundenname]“); dann füllt man Page Tab URL und Secure Page Tab URL aus (da kommt die URL zu der erstellten Impressum-HTML-Datei rein). Schließlich klickt man auf „Änderungen speichern“ – und fertig: die eigene Impressum-Anwendung auf Facebook ist erstellt.
Mit der Umstellung auf die Chroniken, auch für Fan-Seiten, hat sich die Einbindung der erstellten Anwendung als neuer Tab in die eigene Fanseite etwas geändert. Nach der Fertigstellung der Anwendung ruft man die folgende URL auf:
https://www.facebook.com/dialog/pagetab?app_id=Ihre-App-ID&display=popup&next=http://www.facebook.com/
Dabei muss man anstelle „Ihre-App-ID“ die eigene AP-ID eintragen (die vielen Zahlen). Bei dem Aufruf der URL kann man dann links oben die Anwendung einer oder mehreren Fanseiten hinzufügen. Unten rechts klickt man dann auf übernehmen. Auch fertig.
Als letztes ruft Ihr Eure eigene Fanseite auf und klickt auf den Bearbeitungsmodus und dann dort auf „Anwendungen“. Dort könnt Ihr die neue Impressum-Anwendung noch bearbeiten. Das war’s!
Das entscheidende Stichwort im Urheberrecht heißt „Schöpfungshöhe“. Das heißt grob erklärt, dein Werk muss so gestaltet sein, dass die die Einzelkomponenten einen so geringen Anteil am Endprodukt haben, dass die Urheberschaft der Ausgangsmedien nicht mehr relevant ist. #

A website style guide is an ideal way to ensure brand identity, professionalism and consistency across your site. Steve Fisher explains how to go about writing one.
Update 2012-06-18: Eigentlich ist die Lösung, Pierre-Henri sei Dank, über preg_match zu erreichen.
Screencast #91: The WordPress Loop
Zwei Loops auf der Startseite: WordPress Custom Loops
Adding PHP conditionals inside The Loop
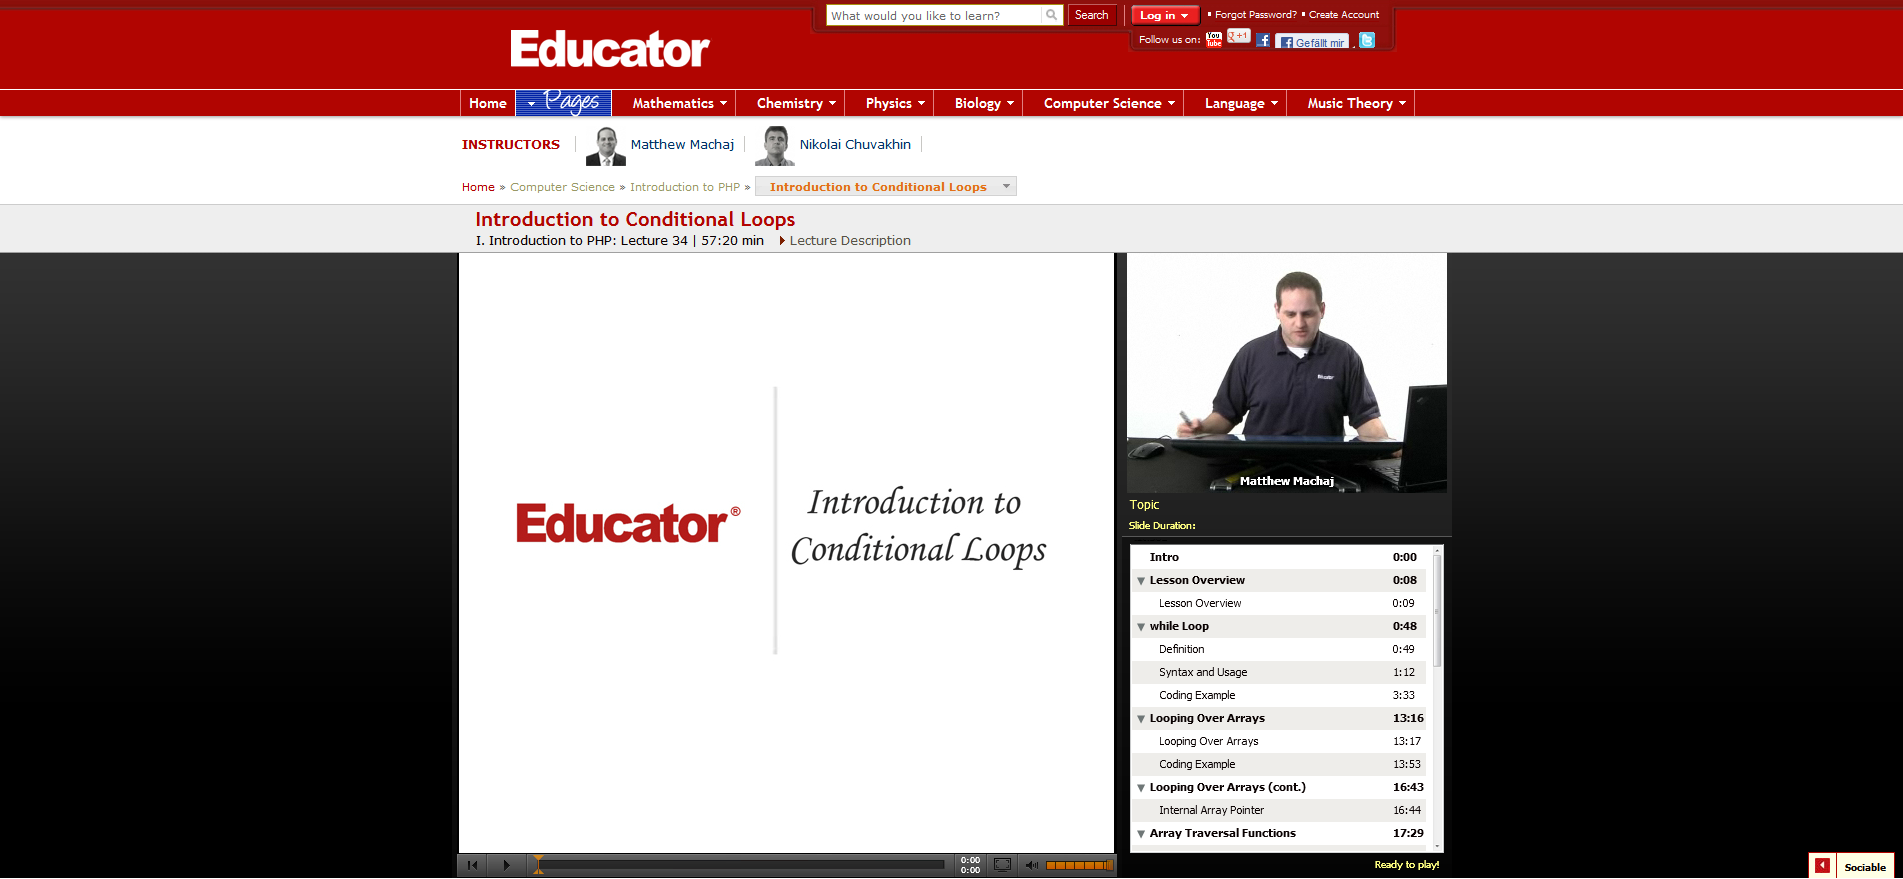
PHP – While Loops (Conditional Loops)
PHP – Nested Conditional Loops
Dann paar Links:


The Golden Grid adds the horizontal guides to the 960 Grid System. The rectangles formed by the intersection between the lines and the columns are characterized by harmonious dimensions and are the same as those found in nature and in the human body. The layout is magically more balanced, and the positioning of the elements on the page makes for quicker and more precise work.
Inspiration
The Golden Grid takes its inspiration from the concept of harmonious relationships found in the golden section. In the world of printing and typography, the positioning of elements on a page does not come about by chance, but according to a plan that distributes form and maintains the overall balance.

www.themelab.com/2008/04/04/the-ultimate-guide-to-…
perishablepress.com/easily-adaptable-wordpress-loo…
justintadlock.com/archives/2009/01/23/coding-the-w…
www.dirkpfuhl.de/1343-wordpress-custom-loop-ausgab…
www.elmastudio.de/wordpress/wordpress-tipps-der-lo…
www.catswhocode.com/blog/multiple-wordpress-loops
Category description with multiple categories and get_the_category()